Overview
This post will detail how to setup a private Maven repository in order to easily share Java, Scala, Clojure, and Android libraries with internal teams or external customers.
In this example. we show how to use Jenkins CI to push an example library, and also how to utilize the example library from the repository through two different Java build tools -Maven and Gradle. This example is typical of Java-based organizations where a core frameworks team maintains a common library used by developers in different teams, each using their own preferred build tool. This example also applies to a company developing commercial Java-based software library that is stored in private Maven repository that controls access through read-only tokens.
The steps to push a Java library to a private Maven repository are:
- Choose a private Maven repository (build or buy) that has native integration with your CI (simple) or has a CLI (flexible)
- Create a private Maven repository
- Configure Maven pom.xml to use the private Maven repository plugin
- Configure Maven pom.xml with the private Maven repository url
- Configure your CI settings with environment variables & credentials required to communicate with the private Maven repository
- Configure triggers in CI to kick of Maven build and deploy
The steps to utilize a Java library from a private Maven repository (for Maven, Gradle and others) are:
- Check the documentation to understand how the private Maven repository supports your Java tool
- For Maven: Configure pom.xml to enable Maven to install the Java library stored in the private Maven repository
- For Gradle: Configure build.gradle to enable gradle to install the Java library stored in the private Maven repository
- For sbt: Configure build.sbt to enable sbt to install the Java library stored in the private Maven repository
Why Set Up A Private Maven Repository?
There are 2 main uses cases for private Maven repository.
Internal Java Library Deployment
As microservice architectures become increasingly prevalent in our industry, the number of internal libraries needed by applications, and the number of servers those libraries need to be installed has exploded. Internal devops teams need a secure, reliable, and efficient way store and distribute Java libraries used for deployment to servers that power their cloud applications.
Commercial Java Library Distribution
Commercial Java library software companies need a secure, reliable and efficient way to store and distribute their products to their paying customers. On top of that, they need fine-grain access control to restrict access to various Maven repositories holding different Java libraries based on the different licenses their paying customers possess.
Both have given rise to the importance of setting up a reliable and secure private Maven repository.
Getting Started
You can follow along with this post by cloning our example-framework project on Github.
Create packagecloud Maven repository
If you don’t have a packagecloud.io account already, click the button below to sign up and create your private Maven repository.
Easy to use Maven repositories, free.
Deploying to your private Maven Repository
We’re going to be deploying our example-framework library using Jenkins CI and our private Maven repository on packagecloud.io. Note that even though we use Jenkins CI here, Packagecloud support a lot of other CIs natively through these integrations.
Maven Setup for Jenkins CI
Before we begin, we need to make sure our Maven project is ready for use on Jenkins CI.
Add .jenkins.settings.xml file to your Maven project
We need to add a custom Maven settings.xml file that instructs Maven to use an environment variable for the password for any repositories with the id of packagecloud-examplecorp.
.jenkins.settings.xml
<settings xmlns="http://maven.apache.org/SETTINGS/1.0.0" xmlns:xsi="http://www.w3.org/2001/XMLSchema-instance" xsi:schemaLocation="http://maven.apache.org/SETTINGS/1.0.0 http://maven.apache.org/xsd/settings-1.0.0.xsd">
  <servers>
    <server>
      <id>packagecloud-examplecorp</id>
      <password>${env.EXAMPLECORP_PACKAGECLOUD_API_TOKEN}</password>
    </server>
  </servers>
</settings>
Add your repository to your Maven project
In the <distributionManagement/> section of your pom.xml, we’ll need to tell Maven to deploy to our newly created private Maven repository, as demonstrated below.
Note that the id is set to packagecloud-examplecorp, which is what we used in our .jenkins.settings.xml file above.
<distributionManagement>
  <repository>
    <id>packagecloud-examplecorp</id>
    <url>packagecloud+https://packagecloud.io/exampleCorp/core</url>
  </repository>
  <snapshotRepository>
    <id>packagecloud-examplecorp</id>
    <url>packagecloud+https://packagecloud.io/exampleCorp/core</url>
  </snapshotRepository>
</distributionManagement>
Add the packagecloud plugin to your Maven project
Lastly, you’ll need to add the plugin that lets Maven natively deploy artifacts to packagecloud.io repositories. Note: this plugin is only needed to upload artifacts, no plugin is required for downloading artifacts. Any Maven-compatible build tool can use your private Maven repository.
Add the following to the <build/> section of your project pom.xml.
<build>
  <extensions>
    <extension>
      <groupId>io.packagecloud.maven.wagon</groupId>
      <artifactId>maven-packagecloud-wagon</artifactId>
      <version>0.0.4</version>
    </extension>
  </extensions>
</build>
Now we are ready to set up our Jenkins CI job.
Jenkins CI Setup
Setting up a Jenkins CI instance is out of the scope of this post, so we’ll assume you have access to one already.
In this section, we’ll be adding our API token to the credentials system in Jenkins CI, then creating a job that uses that API token as an environment variable to invoke the mvn deploy goal on our Maven project, using the .jenkins.settings.xml file we added above.
Let’s get started!
Add packagecloud credentials to Jenkins CI
In order to authenticate Maven artifact uploads, Jenkins CI will need to know your packagecloud.io API token. An API token allows Jenkins CI to upload to any repository that user has access to. You can create as many “deploy tokens” or “write tokens” as you need by creating separate users on packagecloud.io and adding them as collaborators to the desired repositories. Their individual API tokens will be limited to upload only to those repositories.
Add your packagecloud.io API token to the “Global credentials” as a “Secret Text” item, as shown below.
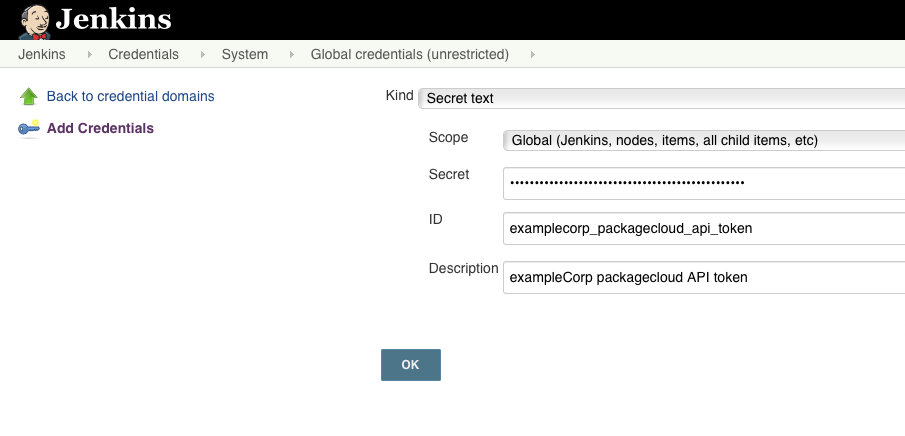
To learn more about how Jenkins CI stores and uses credentials, refer to the Credentials Plugin page.
Create Jenkins CI Job
Our example job is a Free-form project that pulls down a Git repository and executes a single Maven goal when triggered.
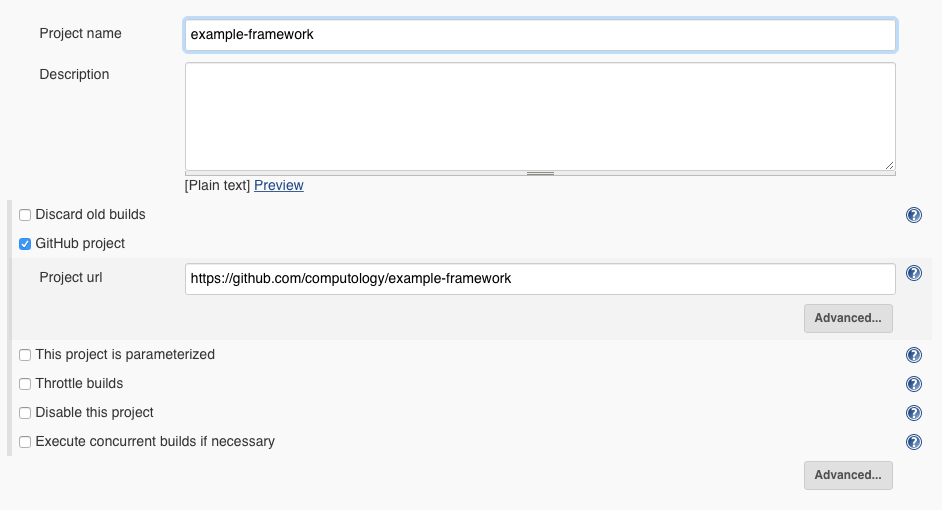
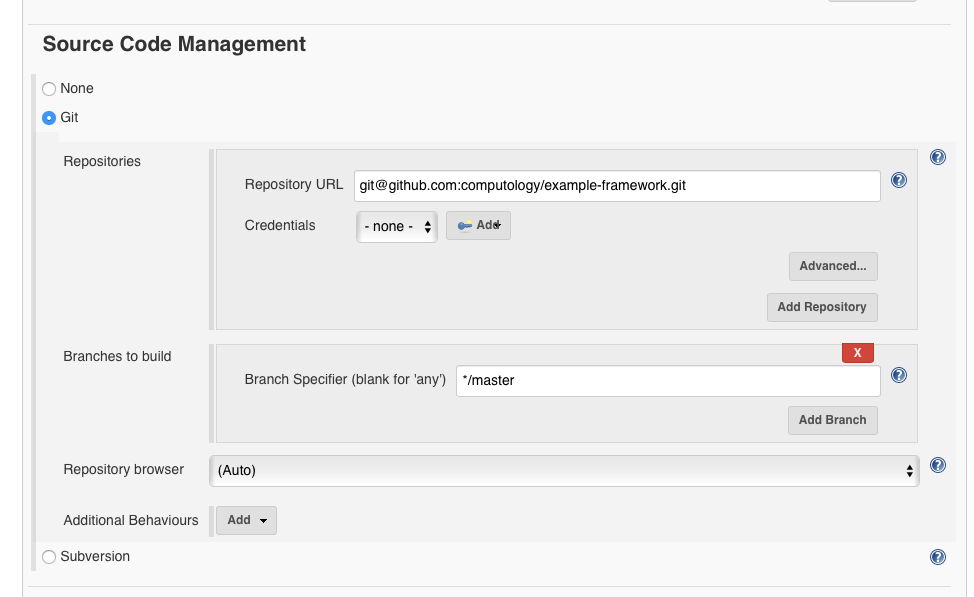
Source Code Management
Set your Git repository URL and Branch Specifier under “Source Code Management”, we’re using our example-framework Github project here.
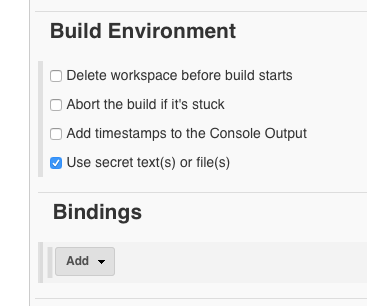
Build Environment
Under Build Environment, make sure that “Use secret text(s) or file(s)” is checked.
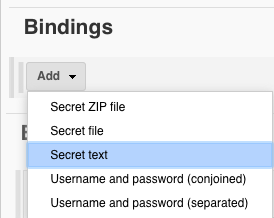
Environment Variable Bindings
Then, under “Bindings”, click “Add”, then “Secret text”.
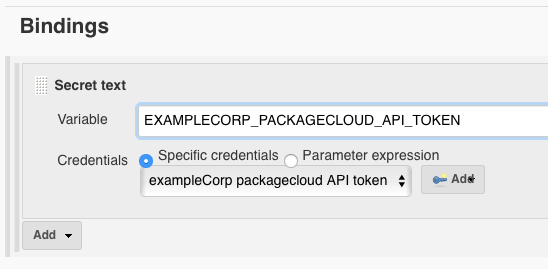
This is where we bind the packagecloud.io API token we stored above to the environment variable Maven is configured to use for authentication.
Set the variable name to match the one used in .jenkins.settings.xml and select your desired credentials from the dropdown.
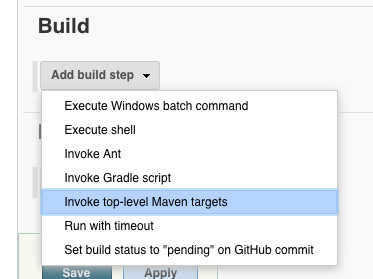
Add build step
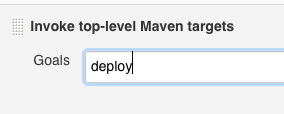
Add an “Invoke top-level Maven targets” build step from the dropdown in the “Build” section.
In our example-framework project, we are using a [SNAPSHOT version](https://github.com/computology/example-framework/blob/master/pom.xml#L7, so we can just run mvn deploy every time the job runs without having to worry about incrementing the version number.
When writing Maven goals in Jenkins CI, the mvn part is implied, so simply write deploy as the goal.
Then, click on the “Advanced…” button.
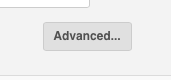
This is where we tell Jenkins CI to use the custom Maven settings file we added to our project at the beginning of this post. The path is relative to the project workspace, so we can just set this to .jenkins.settings.xml since it lives in the root of our project. Also, make sure that ‘Use private Maven repository’ is checked.

Trigger Jenkins CI build
Normally, your Jenkins CI job would be triggered externally, either via a Github Pull request, or when new source code is added to the repository. But for our example, we’ll keep it simple and just trigger it manually by clicking “Build now” on the job page.
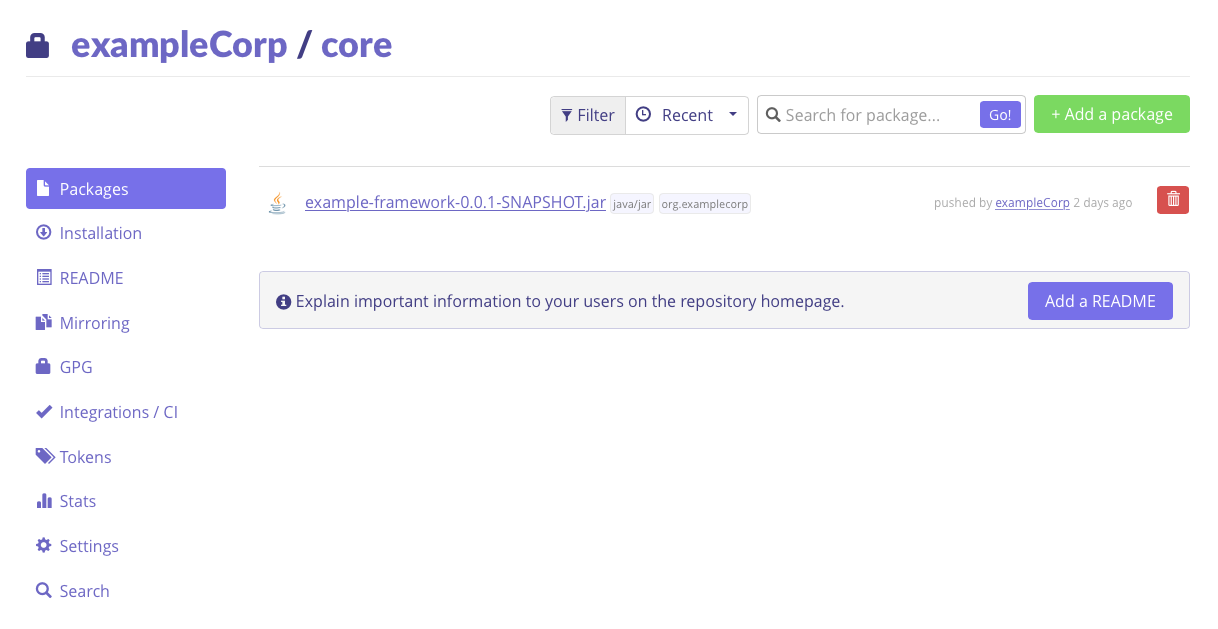
Done!
Once the job finishes, you should see your artifact on your packagecloud.io repository page.
Sharing your private Maven repository
Now that our library is deployed to our private Maven repository, we’ll need to configure the Maven and Gradle projects to access it.
Token Authentication
Access to your private Maven repository is controlled via a sophisticated token authentication system. These tokens are generated independently of user accounts. This means that employees do not need a packagecloud.io account in order to use your private Maven repository.
Master Tokens
Read Tokens are created as children of Master Tokens. The sole purpose of Master Tokens is to create Read Tokens. Once a Master Token is revoked, all of its Read Tokens are also revoked.
You can manage your repository tokens by visiting the “Tokens” page of your repository or using our API
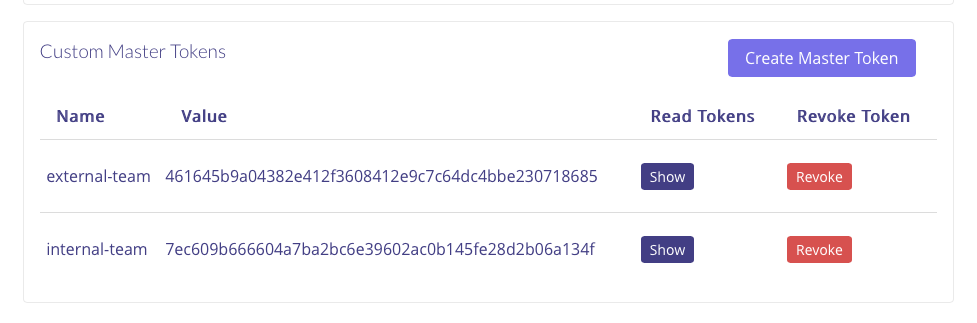
For our example, we’ll create two custom Master Tokens for both of our separate teams: internal-team and external-team.
Generating Read Tokens
Read tokens are generated by making an HTTP request to your private repository using a Master Token and a name value. The same request for the same name value will return the same Read Token. So, you could either store the Read Token value itself, or just the name and Master Token and generate it on demand.
For example, to generate a token for gary in internal-team which is the name of the custom Master Token value of 7ec609b666604a7ba2bc6e39602ac0b145fe28d2b06a134f, the request looks like this:
$ curl -XPOST --data "name=gary" https://7ec609b666604a7ba2bc6e39602ac0b145fe28d2b06a134f:@packagecloud.io/install/repositories/exampleCorp/core/tokens.textAlternatively, you can create Read Tokens using the “Tokens” page on the packagecloud.io repository page.
For more details about our token system, refer to the Token Auth documentation.
Setup for Developers
Similar to our Jenkins CI Setup, we’re going to use an environment variable to hold our developer’s Read token. This can be accomplished any number of ways, either distributed to each developer individually, or set from LDAP via some automatic mechanism.
~/.bashrc
For our example, we’ll just set it manually inside of our ~/.bashrc file.
export PACKAGECLOUD_READ_TOKEN='0x0x0x0x0x0x0x0x...'Maven pom.xml Setup
Similar to our .jenkins.settings.xml file, we’ll add this to the pom.xml of any project that wants to use our example-framework. This is using the PACKAGECLOUD_READ_TOKEN that was set above for authenticating against our private Maven repository.
<repositories>
  <repository>
    <id>exampleCorp-core</id>
    <url>https://packagecloud.io/priv/${env.PACKAGECLOUD_READ_TOKEN}/exampleCorp/core/maven2</url>
    <releases>
      <enabled>true</enabled>
    </releases>
    <snapshots>
      <enabled>true</enabled>
    </snapshots>
  </repository>
</repositories>
Gradle build.gradle Setup
Like Maven, we tell Gradle to use the PACKAGECLOUD_READ_TOKEN environment variable to authenticate against our private Maven repository.
repositories {
    maven {
        url "https://packagecloud.io/priv/${System.env.PACKAGECLOUD_READ_TOKEN}/exampleCorp/core/maven2"
    }
}
Conclusion
Publishing and using libraries doesn’t have to be difficult or tedious. Having a private Maven repository manager that the whole team can easily use is crucial for increasing developer collaboration and reducing duplicated effort.